Plumbing

Important Features of Water Heaters

Aurora CO Water Heater Repair are important appliances used to sanitize dishes, wash clothes, and provide hot shower water. The peak hour demand of your household usually sizes water heaters.

Peak hour demand is calculated by counting the number of occupants in your household and multiplying it by 12. A typical water heater has an EnergyGuide label, which lists its first-hour rating.

A water heater thermostat controls the temperature of the hot water. It does this by sending an electrical current to the heating elements, which are located inside the tank. The thermostat also detects when the water reaches the desired temperature. This prevents the elements from constantly operating, which can save energy and reduce utility costs. A programmable thermostat can also schedule heating cycles during off-peak hours.

The thermostat is located beneath the cover plate of the tank and has a dial to indicate its setting. This can be adjusted to suit your needs, but it is a good idea to keep the temperature below 140 degrees Fahrenheit because this will prevent water from being scalded. If your house has long, uninsulated pipes, raise the temperature above 120 degrees Fahrenheit to compensate for lost heat.

Most modern water heaters are tank types, which consist of insulated tanks that can hold between 20 to 80 gallons. These can be powered by electricity, natural gas, propane, or fuel oil. Most household use is with electric tank-type units, but gas heaters are also available.

These tanks are fed by a dip tube that provides cold water from the home’s plumbing to the bottom of the tank. The thermostat monitors the temperature of the water, and when it drops below a pre-set level, the heating mechanism — either an element or burner — kicks in to heat the water.

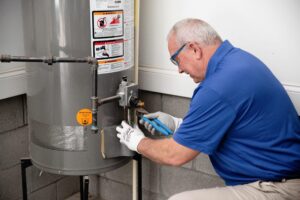
If the thermostats are faulty, it may be time to replace them. To do this, first shut off the power supply to the unit. Then, find the access panel, which is usually covered with insulation. Remove the insulation, and then unscrew the thermostat screws. Once the new thermostat is in place, turn the power supply back on.

A conventional tank-style water heater has a metal outer shell that encases a pressure-tested glass or plastic liner with a heating mechanism inside. Its capacity varies, but it usually holds 40 to 60 gallons (151 to 227 liters). The fuel source is also important, as natural gas, propane, or fuel oil are common. Some tank models have a built-in solar or geothermal energy system for greener choices.

The hot water supply pipe enters the tank through a dip tube at the bottom. Once the water is heated, it’s displaced and rises to the top of the tank. The hot water is then sent into the home’s plumbing systems.

A metal flue running through the center of the tank serves two purposes: it exhausts combustion gases and helps heat the water. There are specific code requirements for constructing the flue, and it must be properly vented outside.

In addition to the water supply and drain valves, the tank has a safety valve that vents pressure and vapor. It’s also fitted with a thermocouple to sense if the heating element burns out or the temperature is unsafe.

Inspect the tank for rust, dents, or leaks regularly. If your water heater starts leaking, shut off the fuel or cold water supply and call in a professional for a repair. A professional can also help you determine if your water heater is the right size for your household. This involves measuring your peak hour usage to calculate your Family Heat Rate (FHR). In some cases, it might be better to have a smaller tank rather than a larger one. This is especially true if your household uses energy-efficient appliances and takes shorter showers.

A drain valve allows air to exit the tank, removing collected condensate. It consists of a stem that runs parallel to the body’s hollow section and can be lowered or raised to open or close the passage. The stem of certain drain valve designs prevents flow, while the stem of others raises or lowers a flow-blocking gate in the shape of a disk or ball. Many variations on these basic models can accommodate different levels of fluid service and operational needs.

Water heater tanks collect contaminants such as calcium, other mineral sediments, and dirt in their bottom. These substances reduce the tank’s heating efficiency and can damage components. To keep them operating at full capacity, these contaminants must be removed from the tank regularly.

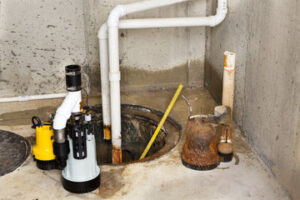
To empty the tank, you must shut off your water valve and drain it through its drain valve. You’ll also need a bucket and towels to catch the water that will be pouring out. It would be best to shut off the power to your tank before beginning work.

To open the drain via:

  1. Locate the coupling nut positioned underneath the regulator valve side of your ta
  2. k. Use an adjustable spanner to rotate the nut in a counterclockwise direction. Once it’s open, you can remove the nozzle and attach a hose to the drain valve
  3. Place the hose in a bucket to help speed up the draining process.

s.

The temperature and pressure relief valve is an essential safety feature of your water heater. When the tank becomes too hot or pressurized, this valve is designed to open and release the excess water into a discharge pipe. This protects the water heater from bursting, which can cause serious property damage and injury.

The water heater’s pressure valve is located at the top of the water tank. It has a metal lever that can be opened or closed manually and a discharge tube that runs down to a safe spot for the water to discharge. The water heater’s owner’s manual should specify the steps to open the pressure valve. It’s a good idea to wear closed-toed shoes when doing this to reduce scalding risks.

You should also make sure that the discharge tube is a safe distance from the water heater and is not obstructed by any objects. The discharge pipe should run to a bucket or a drain to catch the discharged water. It should be 1.5″ off the floor and be made of copper, CPVC, or galvanized steel water piping.

The pressure valve should be tested by opening it at least once a year. This ensures that the waterways are clear and that the valve is working properly. If you suspect that the water pressure valve is leaking or not functioning, it’s best to call in a professional to replace it.

The anode rod is a steel core wire surrounded with aluminum, magnesium, or zinc that screws into the top of your water heater. Often referred to as the “sacrificial rod,” the anode rod is meant to draw the corrosion process away from your tank’s steel lining and toward itself, protecting the more expensive steel components in your water heater.

You can replace your anode rod by purchasing a new one at your local hardware store. The choice of material depends on the chemistry of your water. For example, magnesium is typically used for most homes with hard water because it “gives up” electrons faster than aluminum, protecting the more expensive carbon steel tank lining from rust.

If you live in a soft water area, use an aluminum anode rod because it erodes more slowly. It would be best if you replaced your anode rod every three years or so, depending on the water chemistry in your area.

The longer your anode rod lasts, the less likely you are to call a plumber to repair or replace your water heater. If you have a rotten egg smell, the air in your lines, or your hot water seems choppy, your anode rod may need to be replaced.

Unless your water heater has a dedicated hole for the anode rod, it will be close to the flex line that attaches to the hot water outlet. The rod is usually labeled on the unit and locked into place with a hex nut. Once the hex nut is loose (which you can do with a crescent wrench, channel locks, or a socket wrench), you can pull out the rod and inspect it for signs of deterioration.

Plumbing

Sump Pump Maintenance Essentials

A sump pump should be able to keep your home protected from flood damage as long as you keep up with routine maintenance. Start by ensuring your pump is connected to the power supply and plugged in properly.

Sump Pump

Then find the discharge line and ensure it leads away from your foundation, not towards it. Check that the line is not clogged or filled with debris. Contact Plumber Spring TX for professional help.

The float is one of the most important parts of your sump pump. It rises when it senses water in the basin and triggers the pump to turn on. It also stops the pump when it reaches its end of its cycle. This is why it is so crucial to check the float for wear and tear each year.

Grasp the float in your hand and test it by lifting it as high as you can. If it starts the motor, then your float is working correctly and your pump is doing its job. If it doesn’t, there could be an issue with the float switch or even the discharge line. You will need to examine the float and check on the lines for any debris or blockage, and you will likely have to replace the pump.

If your float isn’t working properly, the first thing you should do is remove the pump from the pit and put it into a bucket or trash bag to prevent a mess. Then you can use a wet vacuum to get rid of any water in the pit and clean out any dirt or sediment. Examine the discharge line for any blockages as well, especially since this is where a lot of sediment tends to collect over time. It is a good idea to replace the discharge line on an annual basis, too, as it can clog easily with debris and cause your pump to start running continually.

Once you have removed the pump, plug it back in and reconnect any electrical or plumbing lines that were disconnected while removing the unit. Then, refill the sump basin with five gallons of water and watch the float switch to see if it moves through its full range without binding or turning the pump on and off at the proper times. If not, you’ll need to install a new float switch. It’s a good idea to look for a replacement that is the same type as your existing one, so you can use your old wires. Also, check the owner’s manual for your pump to see if the bearings need lubrication.

Inspect the Check Valve

Your sump pump needs a check valve on the discharge line to prevent water from back-flowing into the pit after it pumps it out. This one-way valve opens to let the water flow out and snaps shut to keep it from flowing back into the pump when it stops running. If you notice that your sump pump fills up with water again right after it finishes its cycle, this means the check valve isn’t working correctly.

This can happen if the valve is leaking, or if it’s not installed properly, so you should inspect it regularly. You can do this by pouring water into the pump to activate it, then watching to see how it behaves. A good check valve will quickly open and close to allow the water out and then snap back shut, preventing reverse flow.

A bad check valve can wear out very quickly, so if you’re seeing signs of deterioration or not sure how to test it, you should replace it as soon as possible. You can also inspect your pump’s discharge pipe for any damage that may be causing water to back-flow into the pit, and make sure there are no obstructions in it.

It’s a good idea to remove your pump from the basin and clean it at least once each year. You’ll be able to examine it for external damage, clean the grate, check the drainage pipes, and remove debris from the pump inlet screen or pit. This is a good time to also lubricate the pump bearings if needed.

Unplug the pump and drain any water in the basin with a wet vacuum. You can also disconnect the discharge pipe from the pump if you’re able to reach it easily, but be careful not to damage the plumbing. Drain the check valve as well, and then use a wet vacuum to get rid of any debris left in the basin or discharge pipe. Once you’ve finished, plug your pump back in and test it by pouring five gallons of water into the pit to see that the float switch is activating the pump and pumping out the water as it should.

Test the Alarm

A sump pump alarm is similar to a smoke alarm in that it will activate and let you know something’s wrong. Unlike smoke alarms, however, a sump pump will tell you if the problem isn’t a blown fuse or a faulty circuit breaker—in most cases, it’ll indicate that your sump pump is not working correctly. It might have an underlying issue that requires outside assistance to resolve.

If your sump pump keeps cycling on and off during heavy rainstorms, it might not be able to keep up with the water that’s flooding into the basin. If this is the case, it’s important to have a professional inspect the pump and see whether it can be upgraded to match your home’s needs.

It’s also important to regularly test the pump. Pour about five gallons of water into the basin to see if the pump activates and pumps out the water properly. Also, check the inlet screen and clean it if necessary. If you need to, use a brush and cleaner to scrub the inlet screen to make sure it’s clear.

Lastly, inspect the discharge line to ensure it’s not clogged or blocked by sediment. It’s also important to test the backup power source to ensure it works properly, which will help you avoid a flooded basement in the event of a power outage or the primary sump pump fails.

In between annual visits from a plumbing professional, you can do some basic maintenance to extend the lifespan of your sump pump. First, verify that the power cord is plugged in properly and re-check the outlet for any signs of damage. If you don’t have a dedicated outlet for your sump pump, consider installing one or using an extension cord until you can have the pump’s original outlet fixed. Finally, test the backup power source to see if it’s functioning properly (it should have a built-in surge protector or a GFCI socket that automatically shuts off).

Clean the Inlet Screen

The inlet screen is a vital component of the sump pump that prevents dirt, rocks, and other debris from being sucked inside the unit when it runs. When it’s clogged, it can prevent the pump from working properly and causing your basin to overflow and your house to flood. To clean it, unplug your sump pump and remove it from the pit. Then, turn it over and use a toothbrush to gently scrub away any dirt or grime.

It’s also a good idea to clean the inlet screen at least once per year. While you’re at it, you should also remove the discharge pipe and clean it thoroughly as well. Be sure to check that the pipe is not clogged and is emptying far enough away from your home (most municipalities have regulations about how close to a structure a sump pump can drain water).

You should also ensure the grate on the bottom of the sump pit is secure. This is where most of the sludge collects and can cause problems if it’s not removed regularly. It’s best to hose off the grate as well, and for any caked-on gunk, you can use a scraper to remove it.

After cleaning the sump pump, you can reattach the discharge pipe and plug in the power cord. Before you do, however, you should recheck the GFCI (ground fault circuit interrupter). If it’s still tripping, press the reset button to clear the issue.

Finally, you should check the owner’s manual to see if your pump requires lubrication of its bearings. If it does, follow the directions in the manual to do so.

Once you’ve completed these steps, you should be able to safely start your sump pump and perform a test run. By following these simple steps, you can keep your sump pump running smoothly and avoid the stress of a sudden failure when you need it most. If your sump pump fails to work correctly, you can always count on a professional service to help! We offer a variety of plumbing services including sump pump installation, repairs, and maintenance.

Plumbing

Epoxy Pipe Lining

Epoxy Pipe Lining is an efficient way to repair old pipes. It offers a smooth inner coating that increases flow and prevents clogs. It is also lead-free and corrosion resistant.

Epoxy Pipe Lining

The process is non-invasive and requires no holes or disruptions to the building structure. It is an excellent option for high-rise buildings with business or resident occupancy.

When compared to traditional repipe methods, epoxy pipe lining is cost-effective and environmentally friendly. This method involves cleaning pipes before lining them with an internal sleeve made of epoxy resin. This sleeve is infused with water to allow it to harden. Once the sleeve is installed, it will protect the existing pipes against corrosion and blockages. In addition, it is resistant to chemicals and other harmful deposits. It is also highly durable, and it can be installed in pipes of all shapes and sizes.

Whether you choose to have the entire pipe lined or just a section, this process will save you 30 to 40% on your repair costs and labor fees. This is because it’s a non-invasive method and doesn’t require the destruction of walls or floors. In addition, it’s eco-friendly because there is less waste to dispose of and you won’t have to dig up old clay or cast iron pipes.

This no-dig technology is perfect for homeowners who need help repairing their broken plumbing lines. It can be used in residential and commercial properties as well as for municipal sewer systems. It is especially effective in older buildings, where replacing pipes might be a challenge due to limited space or structural integrity. It is also ideal for repairing pipes in a difficult location, such as under concrete slabs or behind walls.

Another benefit of this method is its ease of installation. It is much faster than traditional repair methods, and it can be completed within one day. It is also a cheaper option than pipe replacement because it eliminates the need for costly excavation. It also reduces energy bills by preventing loss of flow capacity caused by corrosion.

Epoxy lining is used for a variety of applications in both residential and commercial structures, including hot and cold water, recirculating systems, fire sprinklers and fire suppression systems. It is also used in industrial facilities, airports, schools, hotels, museums and Navy ships. In addition to being a great solution for leaks, it can also improve water quality and increase sewage flow efficiency.

Durability

If you’re looking for a durable solution to your leaky pipes, epoxy pipe lining is a great option. This innovative technique is less invasive than traditional pipe replacement, and it’s designed to last for half a century. It’s also more environmentally friendly than other methods. You can expect to see savings on your water bill as well as lower repair costs in the long run. However, it’s important to make sure you choose a qualified installer for this type of project. You’ll want to ensure that they assess your system and perform a proper inspection before beginning the work. This way, you can avoid future problems and unnecessary expenses.

Pipes that are used for drinking water and other liquids in commercial and residential buildings must be maintained properly to avoid leaking or bursts. Leaking or corroded pipes can lead to health issues and costly repairs. A deteriorating pipeline can also cause damage to property and create environmental hazards. This is why it’s important to hire a professional plumber to perform a thorough inspection of your pipes before deciding on the best solution for your needs.

The CIPP process uses an epoxy resin that can be cured by UV light, which speeds up the curing process and reduces the overall cost of the job. This process is effective in a wide range of applications, including relining sewer and stormwater pipes. It’s even suitable for repairing piping in difficult to reach places, such as under concrete slabs or behind walls. It’s also an excellent choice for restoring old metal pipes in historic buildings.

Epoxy pipe lining is non-invasive and can be performed on both horizontal and vertical pipes. It’s accomplished by running liners that have been soaked in resin through the damaged pipe. This process allows for a structural seal without disturbing the soil. It’s a great solution for homeowners who need to repair their pipes quickly and affordably. It’s also a good alternative to traditional pipe replacement, which can be very expensive and time-consuming. The liners are strong and corrosion-resistant, and they can last up to 50 years.

Installation

When you have a corroded or damaged pipe, it’s vital to find the right solution. In many cases, pipe lining is a better option than traditional dig-and-trench methods. This is because it can be done quickly and in less invasive ways, saving you time and money. This process uses a flexible epoxy liner to cover the existing pipe, creating a new “pipe-within-a-pipe”. It is also an eco-friendly solution, as it is a permanent fix and does not require any replacement of your old pipes.

This method is called cured-in-place piping (CIPP) and it can be used for both residential and commercial applications. It involves a highly trained team of plumbers who use CCTV sewer cameras to inspect the pipe, remove any obstructions and clean the pipes thoroughly. Once the pipes are clean, they’re ready for the lining process.

The first step in the lining process is to saturate a woven felt material with epoxy resin. This is then inserted into the pipe and an inner bladder is inflated, pressing it against the walls of the pipe to take its shape. The team will then remove the bladder and perform a final camera inspection. The entire process takes about four hours and leaves you with a new, durable pipe that’s completely sealed.

Traditional plumbing techniques require digging large holes in your yard or property to access the corroded pipes. However, this can be disruptive to your home and business, causing damage to your landscaping, driveway, or other structures on your property. Trenchless solutions like epoxy lining, on the other hand, allow contractors to repair pipes without digging up your yard. In most cases, technicians can access your pipes through existing entry points or sewer cleanouts.

Epoxy liners can be installed in both new and old pipes, as long as they’re not damaged or rusted. This technology is ideal for homes with older cast iron and clay pipes that are in need of repairs or replacements. It is also great for repairing sewer and drain lines in basements and bathrooms.

Another benefit of epoxy lining is that it does not leach harmful chemicals into the water supply. The epoxy resin cures to form an inert plastic that is resistant to chemical and microbial attacks. It is also a safe, durable solution that may help increase the value of your home if you ever decide to sell it.

Safety

Unlike traditional pipe replacement, epoxy lining is minimally invasive and does not require removing wall panels or floors. This makes it a suitable solution for old buildings with historical value. It is also much faster than traditional methods and reduces the risk of water leaks for building owners. It can also help improve the resale value of your property.

The slick inner coating of the epoxy liners increases water flow and reduces the risk of blockages. Additionally, it is lead-free and corrosion resistant, ensuring safe and clean drinking water. In comparison, traditional repiping methods can cause leaching or contamination of your potable water supply with harmful bacteria and microorganisms.

Epoxy lining is also a green technology that uses no new materials to repair your pipes. It also minimizes the amount of waste and energy used in the process. Its durability also extends the life of your existing pipe. In addition, it can be used in any type of pipe material, including PVC, Orangeburg, and terracotta. The lining can also replace corroded steel and cast iron pipes in your home or business, improving their function and safety.

However, it is important to note that the use of epoxy liners may expose workers to hazardous chemicals. Therefore, it is crucial to follow the manufacturer’s instructions and take appropriate safety measures when applying the lining. These include using adequate ventilation, wearing protective equipment, and cleaning the pipes properly. It is also important to use a professional plumber who is familiar with the procedure.

In addition, it is crucial to ensure that the pipes are free of any obstructions before the lining is installed. Inappropriate or incomplete cleaning can damage the liners and increase their chances of failure. It is also a good idea to hire a professional plumber who can perform a comprehensive inspection of the pipe system.

In the case of a sewer pipe problem, it is important to have the situation assessed by a licensed professional plumber. Depending on the size of the problem, the technician will decide whether to use an internal or external lining method. This will affect the final outcome of the work and the cost.