Plumber Provo contributes to society in several ways. Their work ensures that we have access to safe and clean water and can drain our wastewater safely.

Plumbers need to have strong technical knowledge and practical skills. They also need to have good customer service and problem-solving abilities.
Plumbing is a skilled trade that requires both technical knowledge and physical stamina. Plumbers need to be able to work on difficult tasks in tight spaces with heavy tools, and must be comfortable working around potentially hazardous materials. They must also have the ability to problem-solve and communicate effectively.
Plumbers install and repair sanitation units, water supply lines, heating systems and fixtures in residential, commercial and industrial buildings. They also connect piping to sewer and waste disposal systems. In new construction projects, they may be involved from the outset, working from blueprints and architectural plans to design and implement plumbing infrastructure. They also inspect and test piping to ensure compliance with building codes and regulations.
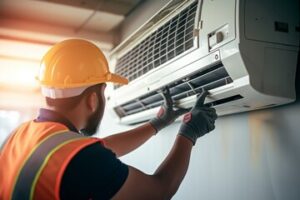
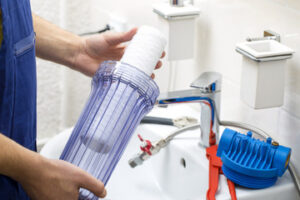
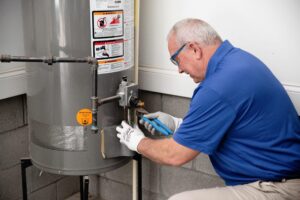
Other responsibilities include maintaining and repairing backflow prevention devices, water heaters, drains and showers. They may also install and repair gas lines. They must be familiar with the latest tools and technology in the field. Plumbers also need to be able to interpret blueprints and plans, as well as apply plumbing math to their work.
Plumbers may be exposed to dangerous microbes when they work on sewage systems, which could cause disease such as cholera and typhoid. They are also at risk of injury from flying debris or broken tools and equipment. They must have the physical strength and dexterity to climb stairs and ladders, as well as use hand or power tools.
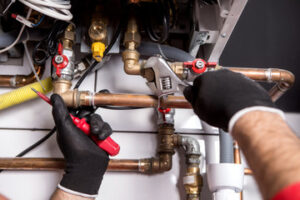
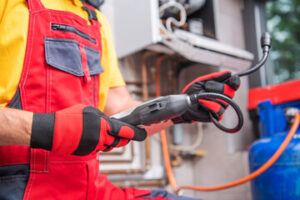
Plumbers must be able to make precise measurements and work with various types of pipes, including copper, steel, PVC and PEX. They must be able to cut and join pipes with soldering and brazing tools. They also need to be able to read and understand blueprints, interpreting layout and dimension specifications for pipe connections, cuts, joints and venting. They also need to be able to operate a wide variety of power and hand tools, including drills, saws, reamers, jackhammers, wire strippers, pipe cutters, snakes and other handheld tools. They must be able to identify the source of leaks and clogs, as well as determine when pipes must be replaced. They must also be able to recognize the signs of corrosion on underground piping, which could indicate the presence of lead.
Education and Training Requirements
A plumber must have a strong understanding of the science behind water flow, the ability to work with various materials and equipment, and a thorough grasp of building regulations. They must also be adept problem solvers, capable of quickly diagnosing and fixing issues ranging from minor leaks to complex system malfunctions. In addition, plumbers frequently interact with clients, so they need to have excellent customer service skills and be able to explain technical issues in layman’s terms.
A high school diploma or equivalency certificate is typically required for plumbers, but you don’t need a bachelor’s degree to get started in the field. Most plumbers are trained through apprenticeship programs sponsored by trade unions or employers. These programs usually last for 4 – 5 years and involve a mix of classroom instruction and on-the-job training. You can find apprenticeship opportunities through local branch offices of trade organizations or by contacting union locals in your area.
Once you’ve completed your apprenticeship, you must obtain a license to work independently as a plumber. This process varies by state and city, but it typically involves passing an exam that tests your knowledge of plumbing codes, safety regulations, and plumbing systems. You can prepare for the exam by taking exam preparation courses or studying plumbing textbooks and guides. Some states also require that you have on-the-job experience before you can apply for a plumbing license.
In addition to education and training, a plumber must be physically fit and able to work in tight spaces. This is a hands-on job that requires you to lift and move heavy materials, so it’s important to maintain good physical health. Plumbers also need to be detail-oriented and have the ability to follow instructions. In addition, plumbers must be able to communicate effectively and work as part of a team. If you’re interested in becoming a plumber, it’s a good idea to contact local plumbers and ask them about their experience. They can provide valuable insight into the career and offer tips on how to succeed. Additionally, many community colleges and vocational schools offer plumbing programs that can help you prepare for the certification exam.
Work Environment
The work environment for a plumber can vary depending on the type of project they are engaged in. For example, residential plumbers usually work in people’s homes or apartments and may need to navigate through tight spaces or confined areas when carrying out their duties. They may also need to interact with residents or tenants to discuss plumbing problems and explain repair options. Plumbers who work in commercial or industrial settings may need to collaborate with other professionals, such as architects or construction teams, to ensure that the plumbing systems are integrated seamlessly into the overall building structure.
Regardless of the work environment, all plumbers must adhere to strict safety protocols when working with hazardous materials or in elevated or confined spaces. They also need to have strong manual dexterity to use hand tools and to thread pipe fittings. In addition, they must be able to read blueprints and other technical documents to understand the design specifications for plumbing projects.
Plumbers can choose to work as employees for private companies or public organizations, or they can become self-employed after completing their training and gaining experience. If they choose to become self-employed, they can set their own hours and determine how many jobs they take on. They can also choose to focus on specific types of plumbing projects, such as kitchen and bathroom renovations or drainage network installations. Plumbers are in demand throughout the country and offer a stable career option for those who enjoy working with their hands and providing essential services to the community. If you are interested in becoming a plumber, consider taking the apprenticeship route or enrolling in a plumbing course at a local college. Both routes offer a structured learning program that includes on-the-job training, mentorship and academic skills development. They can lead to long-term career stability and a lucrative income.
Salary
The salary of a plumber depends on a number of factors. The most obvious is the level of experience and qualifications the worker possesses. A plumber with little or no experience will start out on a lower salary than a veteran who has been in the business for years. The type of work also plays a role in how much a plumber can earn. Some plumbers specialize in residential plumbing while others work on commercial plumbing systems.
If a person likes working with hands-on projects and has a good understanding of how to read and follow detailed plans, then a career as a plumber may be right for them. People with strong problem-solving skills are also a great fit for this occupation. Plumbers must be able to identify and correct issues quickly, especially when it comes to water leaks that could potentially damage an entire home.
As a skilled trade, plumbers typically receive good benefits. In addition to health insurance and other basic benefits, some employers offer dental and vision coverage as well. This is a perk that makes this career attractive to many people who are looking for a job with good pay and benefits.
Plumbers can find employment with construction companies, plumbing contractors or in maintenance departments of buildings. Some are even self-employed. Depending on the type of work, a plumber can earn up to $76,810 a year.
Despite the good wages, some people have difficulty with this job because of the physical requirements and stress levels associated with it. The job requires a high degree of physical stamina and the ability to work in tight spaces or on steep slopes. Plumbers must be able to handle a range of tasks, from installing water heaters to unclogging drains and making repairs. They must be able to understand complex piping systems and follow building regulations to ensure the safety of their customers.
Those considering a career as a plumber should research salaries in various cities to find the best place to move to for their particular needs. While there are a few cities that offer salaries above the national average, a move should be made with caution, as the cost of living is usually significantly higher in these locations.